Wednesday, April 29, 2009

Tutorial: Dramatic Photos and Eyes

here is the other tutorial I wrote on Sunday :)

I always tweak my photos a little before scrapping and I love the brightness and contrast sliders as they are so easy to use. But lately, my favourite technique is to use blend modes to create
dramatic looking photos and it is much easier than it sounds!

(Not tested in PSE yet..sorry)

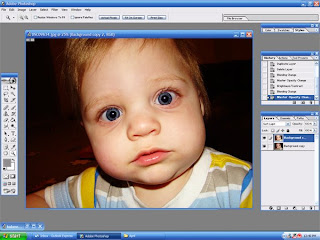
Firstly duplicate the photo layer twice and then delete the original (background layer) as this can't be edited.

Then play around with blend modes, opacity, brightness, contrast, saturation, curves and see what effects you can create! Here are 2 simple examples to get you started:

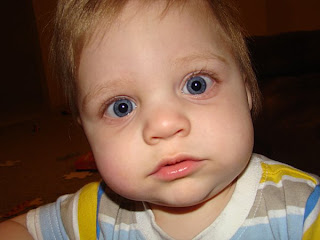
The first photo in the examples below is my original... I love this shot of DS but it is a little bit dull.

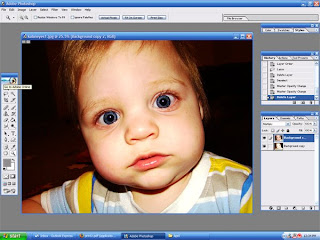
The second shot shows a moderate contrast increase. The bottom layer is untouched and the top layer has been changed to SOFT LIGHT at 100%. The SOFT LIGHT blend mode slightly darkens the dark areas, and slightly lightens the light areas. The top layer is blending with the bottom layer to create this.

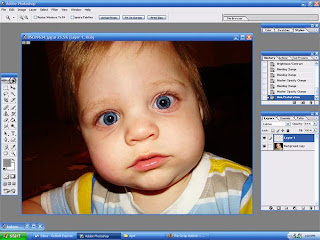
The next shot shows a dramatic change to the original photo. I have greatly increased the brightness and contrast of the bottom layer (you can just see in the layer thumbnail how bright it is), and the top layer is set to MULTIPLY at 100%. The MULTIPLY blend mode greatly increases the dark areas of your photo, while leaving the light areas almost as they were. This gives the edges and dark areas a lot of contrast.

Now in both of the examples his eyes have gone very dark, and they are usually a bright blue. So I'm going to use blend modes to fix them!

Merge your layers (LAYER>MERGE DOWN or LAYER>MERGE VISIBLE).
Firstly you need to lasso the iris. Go slowly and and do a little bit at a time if you need to. Hold SHIFT to add to the selection, hold ALT to take away from it.
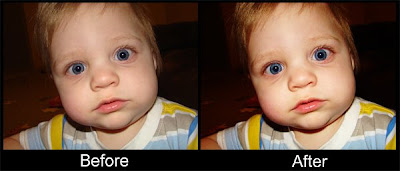
Now with both eyes selected, click LAYER>NEW>LAYER VIA COPY. This will put the eyes on a separate layer so you can play with them as much as you like! Now play with the blend modes, brightness, contrast, saturation, and even hue if the colour isn't what it should be (or you want to change the eye colour).


In my example I increased the contrast slightly, increased the saturation slightly and set the blend mode to LIGHTEN at 54%.


Blend Modes are heaps of fun to play with, and you can create amazing effects with them, but they can be very frustrating if you don't understand what they do. For instance some affect light areas, others affect dark areas and some affect both...and they won't all work for every photo.
For more information about what how the blend modes work...here is some good, but complicated info. Trial and error is probably easiest if you are starting out! lol


Scrapped a page!

So I had LO tag the other day for the Scrap Addicts, and I dragged a photo into PS, and started playing with it and thought..."may as well write a tutorial!" So I did, and then I get back to scrapping and wanted rounded corners...so I thought "may as well make a template and write a tutorial!" LOL! So I finally got the templates and tutorials out of the way and then I scrapped! Woohoo!! And here is my result... it must have been Sunday that I did all this as I remember thinking that it was only 2 days till Kalan's birthday!


Tuesday, April 28, 2009

Happy Birthday Kalan!!

DS turned 1 year old today!! He loved his present we gave him (he gets more for his party) and then we went to an animal farm. He was tired and grumpy but everyone else loved it! I can't believe a whole year has gone by already..and I no longer have a baby in the house! I think he will always be my baby though...and I hope he always gives me beautiful cuddles like right now! :)

Sunday, April 26, 2009

Tutorial: Rounded Corners + FREEBIE!

So I want to round the corner of my photo...such a simple thing in paper as I'm sure everyone has a corner punch!! But how to do it digitally?
I have done it before and it was a PITA..so tonight I made a simple template to make rounding corners of photos and papers much easier!

Firstly download my templates HERE.


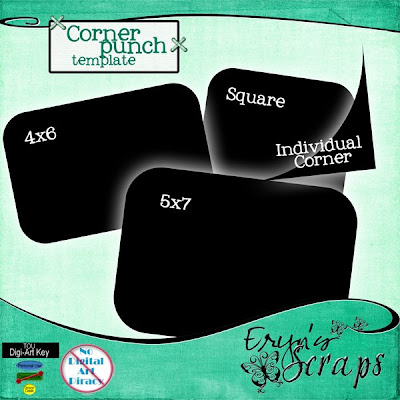
Now I made 2 types of templates...rounded photo templates in 4x6, 5x7 and square, and also an individual corner template.

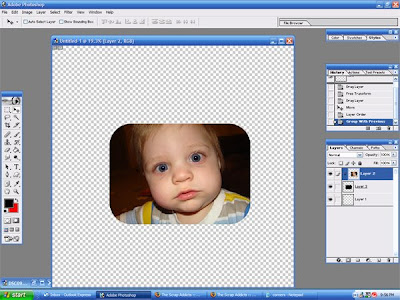
For the full photo template, just drag into your LO underneath the photo layer, resize to fit your photo and then clip your photo to the template (CTRL-G). Make sure the photo layer is selected and above the template layer when you clip.


To use the individual corner template, drag it into your LO and resize to fit your photo.
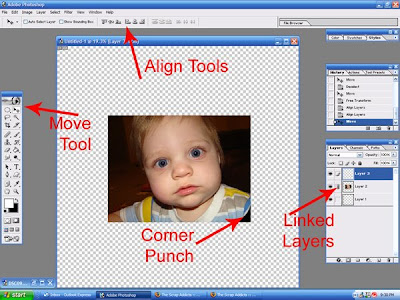
The template needs to be exactly on the corner of the photo so we need to align them. Group the 2 layers (click the group checkbox).
Then choose the move tool and you should see the align tools at the top. Click the top/bottom and right/left to correspond with the correct corner to align both edges.


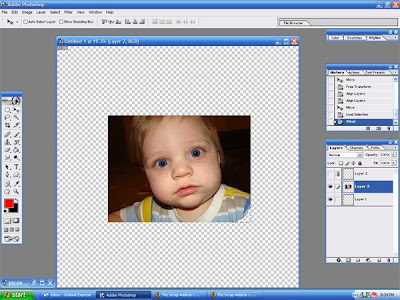
Now select the corner template (CTRL-click the layer). This should give you the marching ants around the corner. Now click on the photo layer and hit delete. LAYER>DESELECT and turn off the corner template (click the eye) and you should have a nicely rounded corner!
This template allows you to round papers or photos that do not fit the pre-sized templates, and also allows you to round only some corners.

Thursday, April 23, 2009

Congrats Melissa!

A big congratulations to Melissa (this, that and whatever) for getting on the CT for Haynay's Hunnies! Your pages are gorgeous and you deserve your CT spots! :D

And of course bigger congratulations are in order soon...good luck with your wedding Melissa! Have a great day and honeymoon!

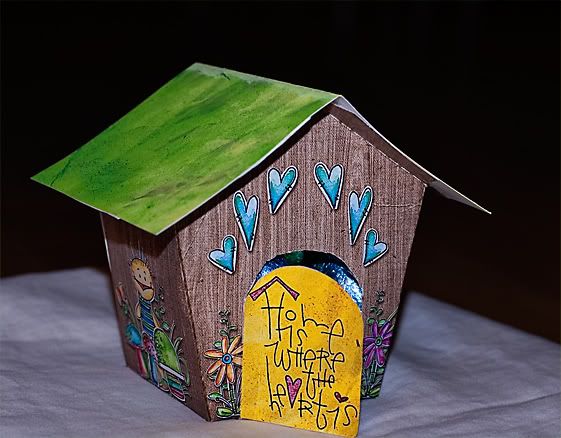
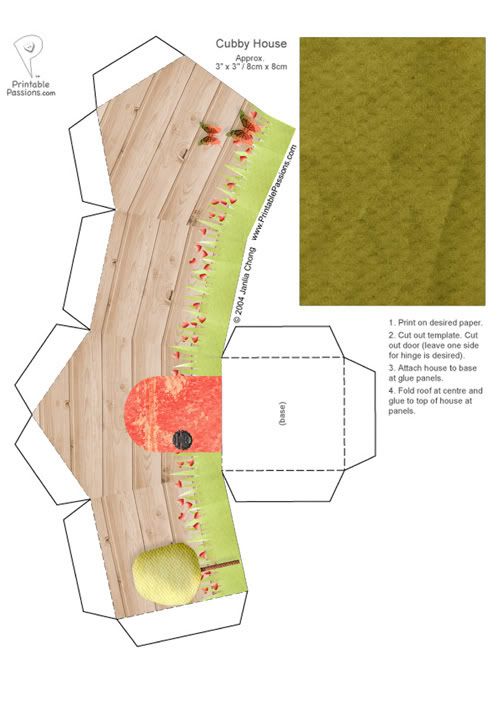
Cute little house - TEMPLATE FREEBIE!

Reading through the Little Dreamer Designs blog recently I saw this gorgeous little house made by Carolee, made from a template at Printable Passions. I was inspired to make one and post a challenge for it at the Scrap Addicts...but when I went to make one I decided it would be much easier if there was a digital scrapbooking template for it. So I made one! Feel free to download my template, made and shared with permission from Janlia at Printable Passions.
All you need to do is open the layered template in your program and clip your papers and elements to the template. Then print, cut and assemble as normal. For more instructions you can check out my Template Tutorial.

DOWNLOAD MY TEMPLATE HERE.

Here is the house made by Carolee from the Little Dreamer Designs blog:


And here is my house so far...so that you can see what it will look like before printing (papers/embellishments not included in template):
Credits: Delicate Spring kit at Digital Crea

Wednesday, April 22, 2009

Tutorial: Your First Digi Page!

If you do not know what ‘layers’ are, please look HERE first.

I use Windows XP so some directions may be slightly different for other platforms. Just ask if you have any problems.

If you don’t yet have a program you need to download a trial version - this can take a long time. Click HERE for options.

If you don’t yet have a kit, google ‘Digital Scrapbooking Freebies’ or check out Scrappy Freebies for the latest kits. You then need to follow the instructions to download them. I made a folder in My Documents called ‘Zipped’ which I download everything into. Once it’s on your computer, double click the file and there should be an option to ‘extract files’. Extract your files and they are ready to use.

LET’S START!
So open your program. These instructions will work in Photoshop (PS) and Photoshop Elements 6 (PSE) but should be very similar for all recent PSE versions. If you have another program and have any problems, just ask and I will work it out for you. In PSE you need to choose ‘EDIT’.

Click FILE>NEW(>BLANK FILE) and you will open a menu. You need to specify the size as 12 inches by 12 inches (or whichever size you prefer to work in). The resolution needs to be 300 DPI (dots per inch/ pixels per inch). Choose RGB colour mode and a white background.


Go to WINDOW>UNDO HISTORY (just HISTORY in PS) which will open your History palette. This shows you everything that you do to your LO (it is limited though) and allows you to ‘UNDO’ them if you are not happy with it. Just click on an earlier action to go back to that stage of your work. PSE also has an UNDO button (just like Word) at the top of the screen.

PHOTO
Now FILE>OPEN and find your photos (usually in ‘My Pictures’) If you can only see the names click VIEW>THUMBNAILS and then open a photo that you want. (You may have trouble with scanned photos, so try camera photos first or ask for help)

Using your Move tool (the arrow right at the top of your tools – see screen shot), click on your photo and drag it into your new page. You need to click directly on the photo, drag and let go once you are over the white of your new file. The photo is probably way too big so you need to reduce the size. In PSE6 you will see a box around the photo. Grab a corner and drag it inwards and click the tick when you are happy with it. In PS click EDIT>TRANSFORM>SCALE, hold SHIFT down and then drag one of the corners inward to a size you like. When you are happy with it press ENTER or click the Move tool. With your move tool you can now drag the photo around your page until you find a nice position.

PAPER
Now for the fun part. Click FILE>OPEN and find your digi stash. Hopefully you have downloaded some papers, so now pick one that you like and drag it into your program. Once in the program you need to drag it onto your page. It should easily snap into place but if it does not, try VIEW>SNAP . Click this and it should now move to the edges of the page. Now, your paper is on top of your photo so we need to drag it underneath. Look at the Layers Palette (WINDOW>LAYERS if you can’t see it) and drag the paper layer underneath the photo layer. You need to click on the grey area of the layers box – not on the image.

EMBELLISHMENTS
Now find elements that you like – flowers, buttons, ribbons etc and drag them into your program and then onto your page. You will notice that everything you drag in becomes a new layer in your Layers palette. If you want to move one of your elements, you need to click on its layer first and then you can move it around or change its size using the box (PSE) or Transform (PS) (see above). Using Transform you can also rotate or flip your element if it doesn’t quite fit your page.

PAPER LAYERS
If you want another smaller paper layer, you need to drag another paper into the program and then page, and using the layers palette drag it directly above your first paper. Now click on the Rectangular Marquee Tool – it looks like a dotted square. Click on your second paper and drag the dotted square out to the size you want (Hold SHIFT for a perfect square). Then SELECT>INVERSE to select everything but your square, and hit DELETE on the keyboard. You should now have your new paper, only in the square that you made. Right Click the Square Selection tool to try out circles/ovals. Remember to change back to your Move tool when you have finished with the Rectangular Marquee tool.

TITLE
Now to add your title. Click the Horizontal Type tool (a big T) and your pointer will change to a text symbol. Click on your page and then drag to make a text box. Then you can write directly into it. You can change your font, size and colour at the top of the screen. If you want to place 2 words apart from each other, then put them in separate boxes so they can be moved individually. If you would like to journal, then make a text box for that also. Click ENTER or the Move tool when you have finished in a text box. And to select it again later, make sure you click its layer first, then use the Text tool to click on your writing.

SAVE
Once you are happy with your page you need to save it. Firstly save it as a PSD file which keeps all the layers so you can change it later. FILE>SAVE AS and make sure the extension is .PSD. Once it is saved go to LAYERS>FLATTEN IMAGE to merge all of your layers together. This makes it a much smaller file, but you now cannot change anything that you have already done. Go to FILE>SAVE AS and change the file extension to .jpg/.jpeg. This is the format you need to print your LO or post it on the internet. For the JPEG Options menu, just set the slider to the highest quality.

To post to an online gallery using PS go to IMAGE>IMAGE SIZE and change the dimensions to 600 pixels wide (for a 12x12 LO). It should ask what quality you want the jpeg saved at, select about 8 or 9. The Pixel Dimensions should now be low enough to post in most galleries. In PSE go to IMAGE>RESIZE>IMAGE SIZE then you need to click ‘Resample Image to Change Pixels’. Change the width to 600 pixels (for a 12x12 LO). Then save it again and reduce the quality to about 8 or 9, (I have a folder called small files) and upload for us all to enjoy.

For more realism, check out my Drop Shadow tutorial.

If you have any problems or want to know how to do something, please ask.
Saturday, April 18, 2009

Tutorial: Digital Scrapbooking Programs

Here are the most common programs that you can use for digital scrapbooking:

Adobe Photoshop (PS): The industry standard. The biggest and best with the biggest price tag. Photoshop can do everything but it is quite difficult and time consuming to learn. If you are good with computers, do not like limitations or would like to design one day, then PS is for you.
PS 7 is the earliest version that is suitable for scrapbooking. Then it goes to PS Creative Suite (CS) 1, 2, 3 and 4. PS CS4 was recently released and retails for US $699. You may however, be able to pick up one of the earlier versions for next to nothing and the differences (for scrapbooking) are minimal in my opinion (for beginners). The latest version can be downloaded from the Adobe website and there is a free trial available.

Adobe Photoshop Elements (PSE): they took the most popular elements of Photoshop and made them easier to use. Elements is a much cheaper and easier program and will suit most people perfectly. In fact it is the most popular program for digital scrapbooking. It retails for US $140 and can be downloaded from Adobe or purchased in most electronics/ computer stores. However, there are limitations and while most people won’t notice them, if you like absolute control then you may want to look at PS. Early versions of PSE are often thrown in with scanners, printers, cameras etc so check your CDs to see if you put it away somewhere not knowing what it was. PSE4 and above are suitable for scrapbooking, but the higher the version, the better. Download the free trial HERE and then if you like it you can pay at the end of the trial. No need to get to a shop.

Corel Paint Shop Pro (PSP): A popular program that I know nothing about.

Ulead PhotoImpact: As above

Microsoft Digital Image Pro: has been discontinued by Microsoft but you may still be able to get a copy of it fairly cheap. It is not one of the more common programs, but is inexpensive and easy to use.

GIMP : this is a free program, but it is not very popular. I don’t know much about it and you will probably have trouble finding tutorials for it. It may be a great place to start though if you don’t want to spend any money.

Macromedia Fireworks: Sorry...not sure.

Tutorial: Starting Digi - What do you need?

Here is another tutorial that I wrote for The Scrap Addicts:

So you’re thinking about giving digi a go?? It doesn’t mean you have to give up paper and you may find (like I did) that it will improve your design skills and therefore paper scrapping. So how do you start and what do you need?

Well you don’t need very much at all actually. A computer with internet, photos on said computer, a program that uses layers (I will explain shortly) and a digi kit. I’m sure you already have the first two and you may have a program even if you don’t know it, or you can easily get one and they don’t have to cost very much.

And the digi kit is easy. There are 1000s of online stores that sell digital scrapbooking elements but you don’t need to spend a cent until you want to. There are so many sites that you can get freebies from and you could easily digi scrap for the rest of your life without buying a single thing. Google ‘digital scrapbook freebie’ and you will be spoilt for choice.

Once you have become addicted to digital scrapbooking and know your style and what you like, then you may want to go shopping, but until then it is safest to start out with the free stuff. And being free doesn’t necessarily mean that it isn’t good quality. Many sites have fantastic quality freebies.

Now on to the program. Digital scrapbooking requires a photo editing program that accepts ‘layers’. I will explain layers HERE. Older versions of some programs often get bundled with scanners, printers, cameras etc, so first thing is to check your CD stack for Photoshop Elements, Paint Shop Pro, Microsoft Image Pro etc. You may not have known what it was and put it aside somewhere. Or you can download a free trial version of a program. There is a quick run down of the most common programs HERE, but my suggestion is to download the Photoshop Elements trial. Find it HERE.

So now you have a program, download a kit from a freebie site and unzip it and you are ready to go. Check out my tutorial on how to start for some pointers.

Monday, April 13, 2009

My LO using Melissa's template!

Here is the Lo I made using Melissa's template! Of course I changed it a bit because I can't do things the easy way, but I love having the template as the basic design! My first LO from a template and I am very happy with it...thanks Melissa!

Grab the template here if you haven't already :)

Sunday, April 12, 2009

Happy Easter!

We have had a great day so far! We woke up to Steven's excited yells that he had found an egg under his bed! He soon got Alysha and Taylah up and they started hunting the house for more! Unfortunately the Easter Bunny was being lazy and hadn't got out of bed yet! lol So I kept them occupied taking photos of their eggs while Mathew slipped outside and hid eggs and bunnies in the backyard. Then we casually asked if they had looked outside yet, and of course...no they hadn't! They had a great time finding their eggs and of course eating them!
We had pancakes for breakfast and then went to the park to feed the ducks and go on the playground. Now Mathew is playing and golf and the rest of us are having a lazy day :)

oh...and Kalan has worked out that if he scrounges around the lounge and floor after his siblings have eaten...he gets to have chocolate too! lol

OH!!! And Steven learned to ride his bike today!! WOOHOO!! He always refuses to let me show him, but today he wanted to do it and listened and now he's zooming around the house SUPER FAST!! And the funny thing is, Alysha and Taylah first learned to ride a bike on Easter Day 3 years ago...I couldn't believe it when I remembered!

Sunday, April 5, 2009

Tutorial: Template Tutorial + Freebie

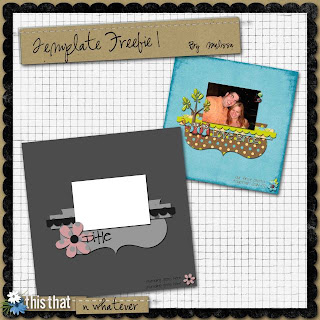
Congratulations to Melissa for joining the Scrap Addicts A-Team! For her first challenge she has created this fantastic template which is available here.


Now due to some confusion and some of our digi gals being unsure as to what a template is, I decided to write a tutorial. I hope this will be helpful to anyone who has not used a template before :)


A template is the digital equivalent of a 'sketch' BUT...it is even easier to use!

After downloading and unzipping you need to open the 'layers' file in your program. This will be the .psd or .tiff file. I will be using Melissa's template for my examples.

There are 3 components of a template - the paper/photo layers, the element layers and the text layers.


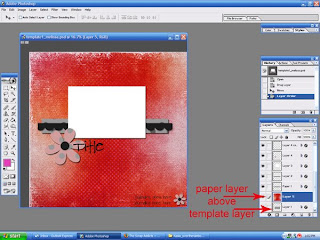
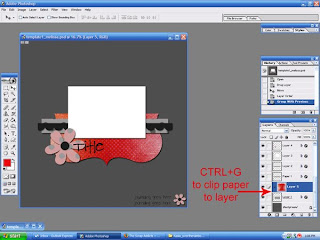
Drag in a paper from a digital kit and in the layers palette, you need to move it to directly above the layer of the template you want to use.


Now hit CTRL-G. This will clip the paper to the template layer so that it is the same size and shape.


If you like, you can move, resize, rotate the paper to get the best part showing.
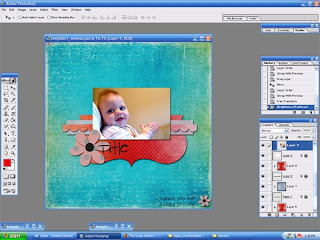
Repeat this for every paper layer and the photo/s layers.


Okay...elements.

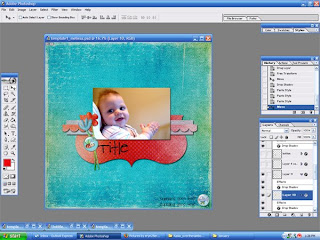
The elements can be used as above if you like what Melissa has made, but they are intended to suggest where you might like to put your own elements. So drag in what you like, put it in the spot and then delete or 'turn off' the corresponding template layer.


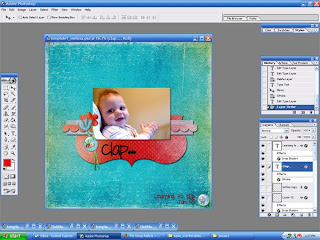
Now the text. Click on the text layer, click on the text and delete Melissas. Write in your own words. You may have to change the font if the one used is not on your computer. You can also change the colours, size, and move it on the page if you like.


When you are done...save as a layered file (psd, tiff), then flatten to save as a jpeg.


Feel free to change or add to the template to make it your own. A template is designed to make your scrapping easier, but not to control it!

Also....if you would like to add styles such as drop shadows or bevels, you can add them to the template layer, or you can merge the clipped layers first. To merge the clipped layers, click the top one and then go to LAYERS>MERGE DOWN. This will merge them to create one normal layer that can be manipulated as normal. Have fun scrapping! :D

Friday, April 3, 2009

Lovin my latest Los!

I am so happy! It's midnight and I am so tired, but I just finished 2 LOs tonight and that is soooo unusual for me! Plus I am really happy with my LO for SUTUCS this week...though it doesn't have many comments yet. :( Doesn't matter though. I love it! I was really disappointed last week, as I only started my LO on Fri, so I didn't have much time for it and I wasn't very happy with it at all. So it was nice to finish early this week and love what I did!
Anyway...here are the LOs I did tonight as I can't show the SUTUCS ones...

Thursday, April 2, 2009

My latest LOs...

Here is a LO that I made for Donna at SA in a LO swap. I had it printed and posted to her and she says she loves it so I that is good! lol


And a few more recent ones...

Melissa's Freebies!

My good friend Melissa has a freebie kit for the KC collab and a quick page available on her blog. Go and grab them and leave a little love for her! :D